How to configure Google API
Google requires that you create an external application linking your website to their API. Application id and secret (also sometimes referred as Consumer key and secret or Client id and secret) are what we call application credentials. This application will link your website example.com to Google API and these credentials are needed in order for Google users to access your website.
These credentials may also differ in format, name and content depending on the social network.
To enable authentication with this provider and to register a new Google API Application, follow the steps :
Step 1
First, go to: https://console.developers.google.com
Step 2
On the Dashboard sidebar click on the tab Credentials on the left side and click Create Project.

Then, fill out the project name.
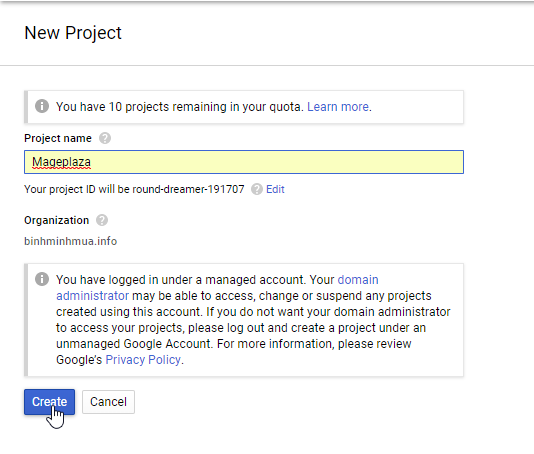
Step 3
At the Dashboard page, filter from Library > Social. Choose Google + API.
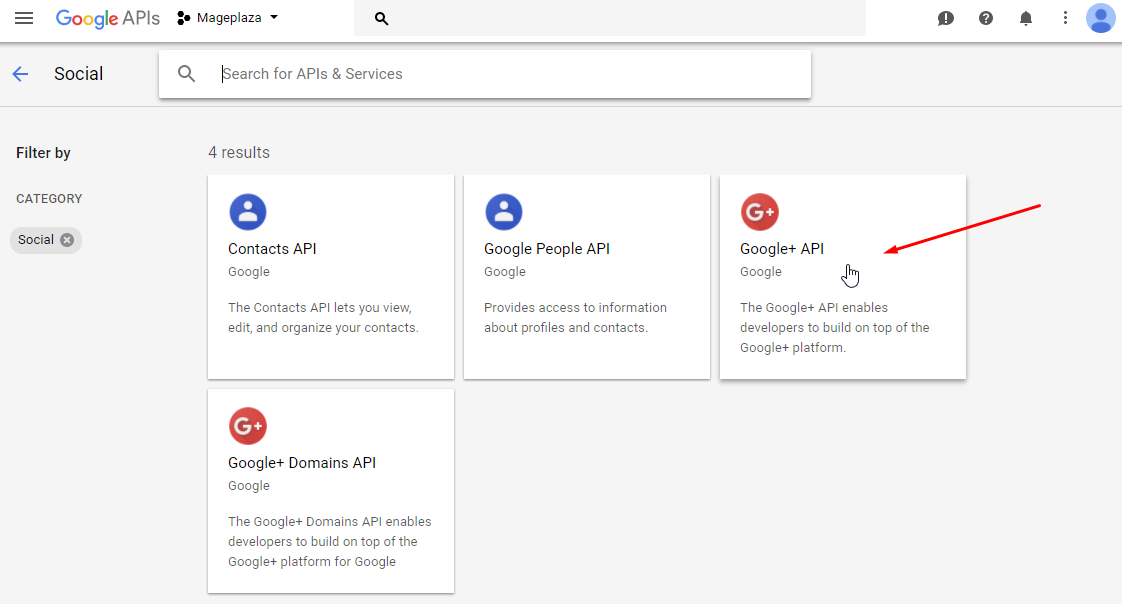
Click the Enable button.
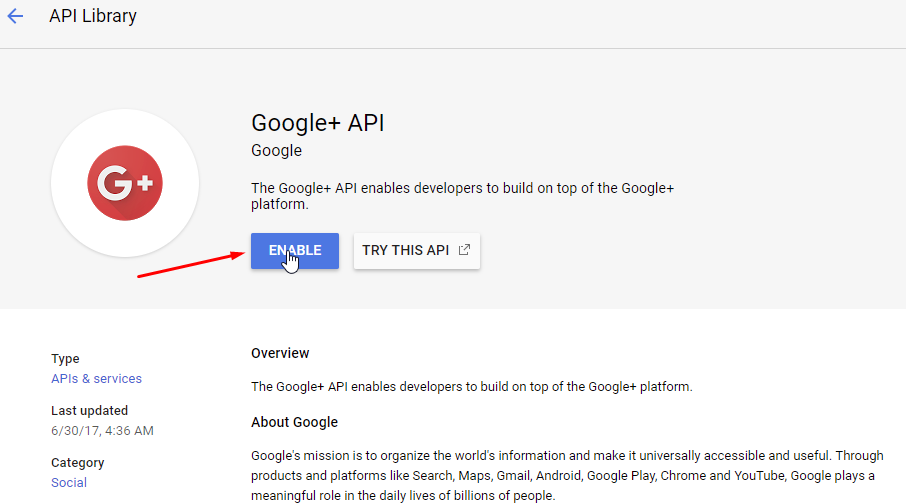
Step 4
Once the project is created. In the sidebar under API Manager, select Credentials, then select the OAuth consent screen tab. Choose an Email Address, specify a Product Name, and press Save.
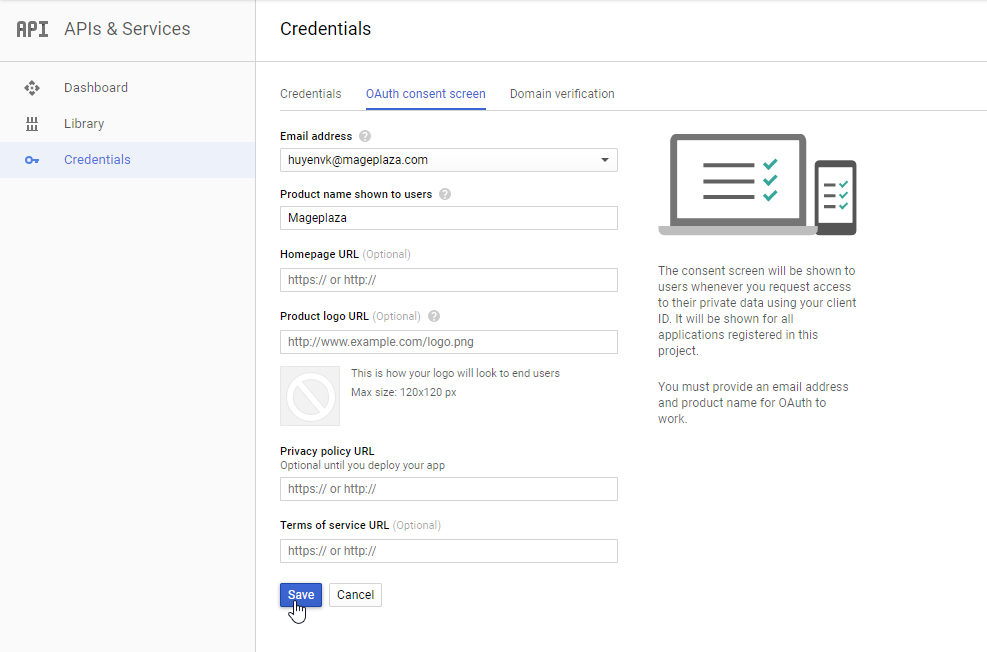
Step 5
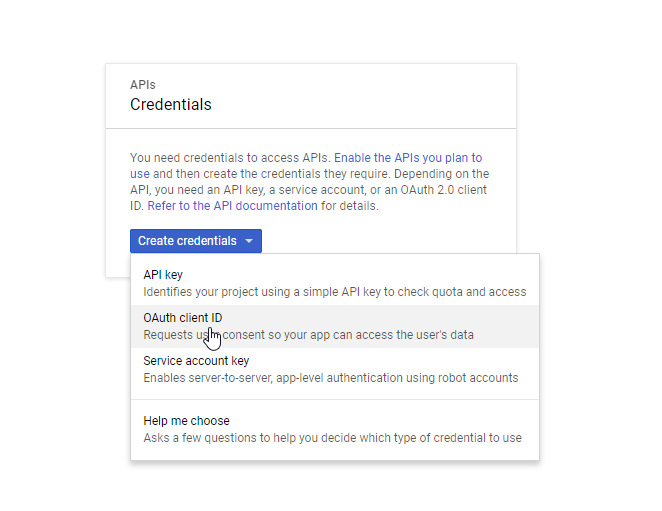
In the Credentials tab, select the New credentials drop-down list. Then, choose OAuth client ID.
Step 6
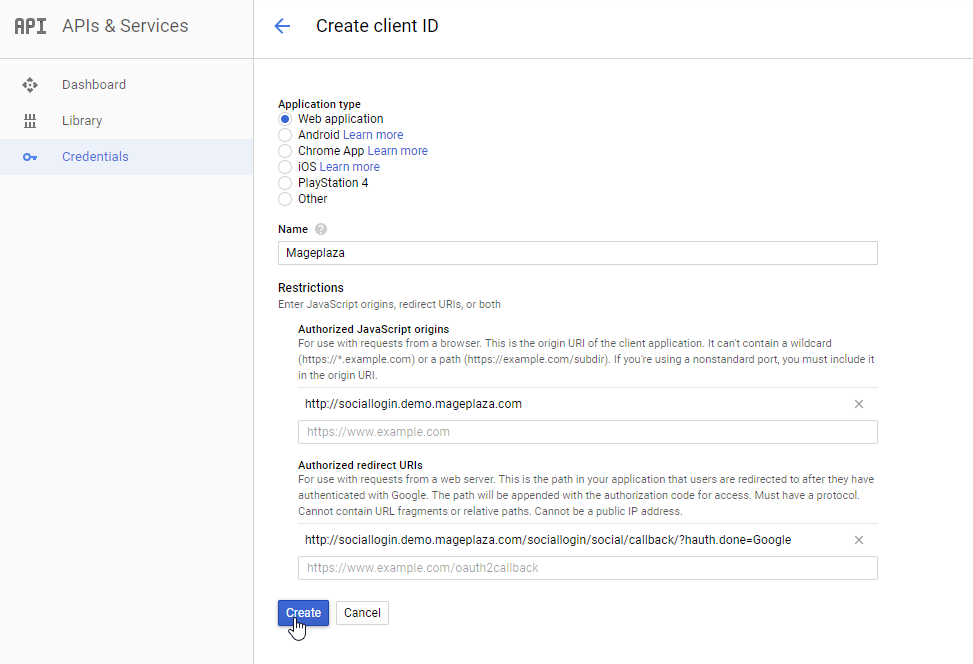
On the Create Client ID field :
- Select Web application as your application type.
- Put your website domain in the Authorized JavaScript origins field. This should match with the current hostname example.com.
- Provide URL as the Callback URL for your application (See in Social Login Configuration).
Step 7
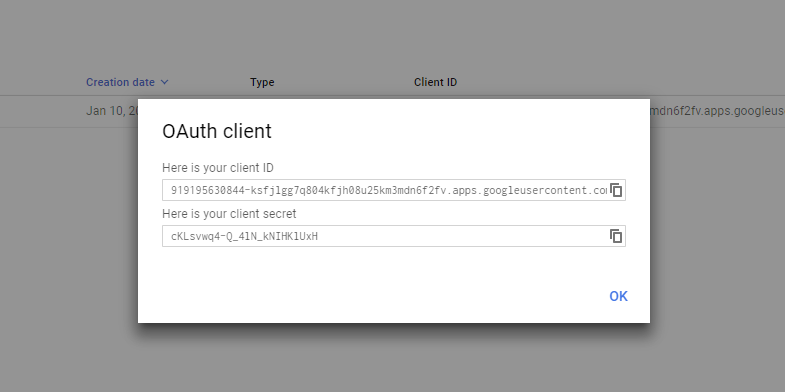
Once you have registered, the popup below will be displayed:
Step 8
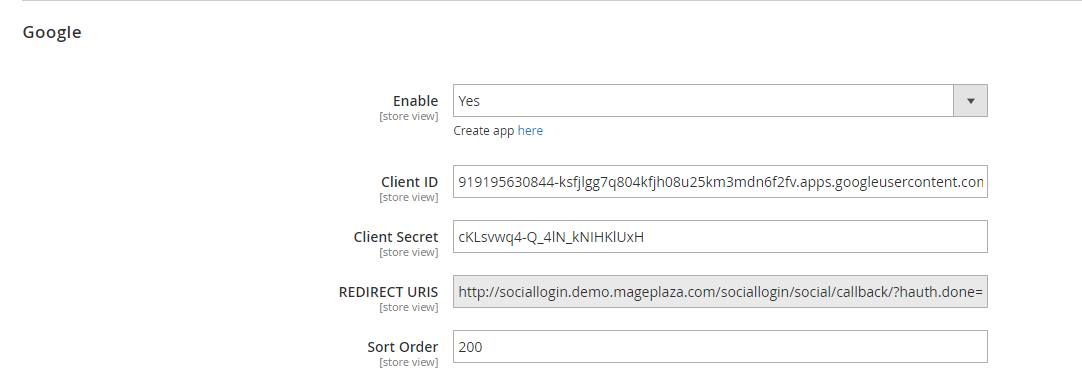
Copy and insert API into API fields in the extension's setting under Admin panel. Please check this image.
And that's it!
If for some reason you still can't manage to create an application for Google, first try to Google it, then check it on Youtube, and if nothing works ask for support.