Order Export
Overview
Mageplaza Order Export extension can make the export process automatically with the information as orders invoices, credit memos, shipments based on Cron scheduler. It allows you to export profiles to file formats such as CSV, XML, Excel XML, TXT, TSV, and Json. Available additional Magento 2 objects for export include: Order, Invoice, Credit Memo, and Shipment. Profile after you generate will be sent to the server by FPT/sFPT or sent to any email that admins want. Besides that, this helps you to save more time and money to quickly export the profiles. This extension promises to be the best exporting solution for Magento shop owners. Mageplaza Order Export is definitely a must-have tool of your Magento store.
How to configure
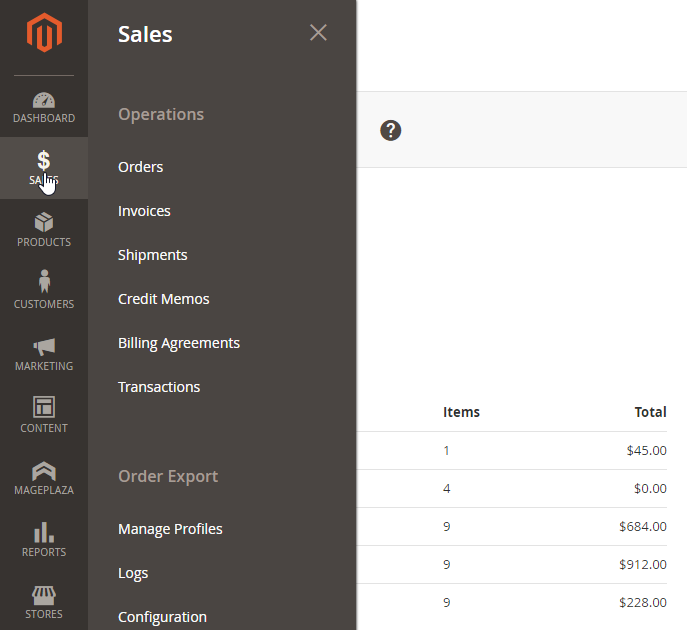
From the Admin Panel, go to Sales > Order Export
Admins can export the profile by 4 ways:
- Manual: Go to
Manage Profiles > Edit Profile, ClickGenerate. After the file is generated, go toDonwload linkto download file - Cron: Profile is generated based on Cron: After a long time, profile will auto-generate the file content. After refresh, go to
Download linkto download file - Quick Export: Easy to export quickly order/invoice/memo/shipment in
Sales > Order/Invoice/Memo/Shipment - Command: Use the command:
php bin/magento orderexport:generate. After the profile is generated the content, go toDownload linkto download file
1. Configuration
Go to Sales > Order Export > Configuration
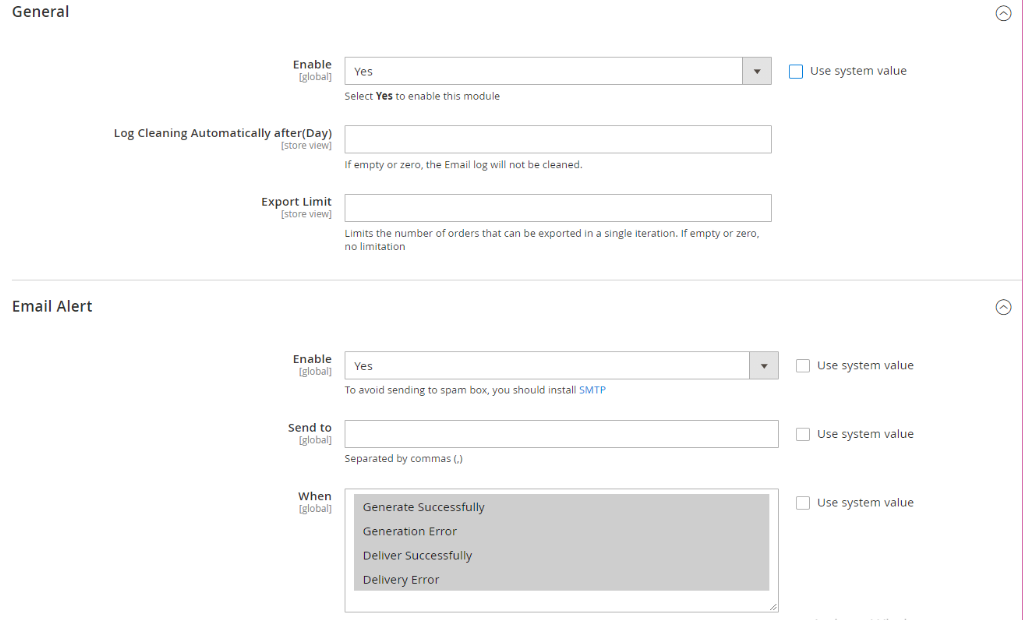
General:
- Enable: Choose
Yesto enable this module and display in theSalessection - Log Cleaning Automatically after(Day): Enter the number of days after which the old logs will be cleaned. If left empty, the email log will not be cleaned.
- Export Limit: Limit the number of orders that can be exported in a single iteration. If left empty or zero, each export will be 1000 orders in maximum.
- Enable: Choose
Email Alert:
- Enable: Choose Yes to enable email notification for store owners
- Send to:
- Enter the email to send the notification
- Allow entering many emails. These emails are separated by commas
- When:
- Choose the events that when it occurs, the email notification will be sent
- Allow choosing many events simultaneously
2. Manage Profiles
2.1. Grid
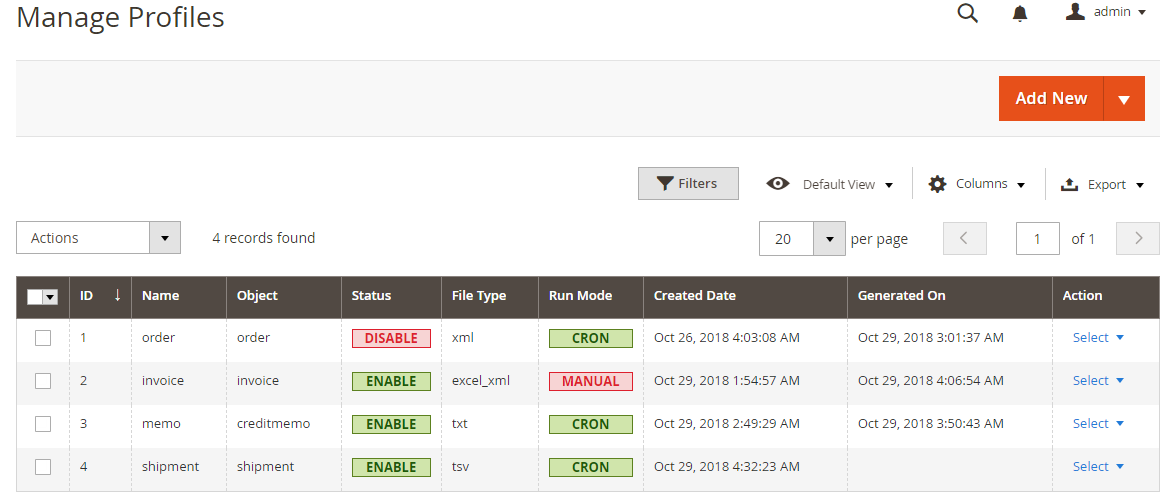
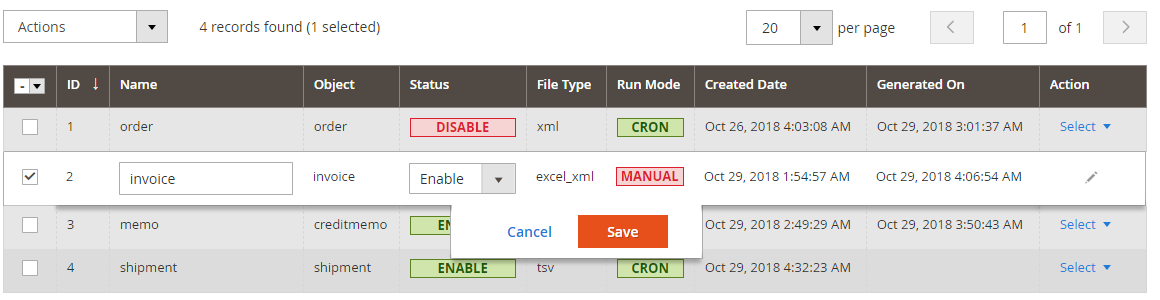
This is a place where all the profiles are stored
From the Grid, admins can capture the basic information of the Profile such as ID, Name, Object, Status, File Type, Run Mode, Created Date, Generated On and Action can be done with Profile.
In the
Actionsdialog, admins can perform the following actions:Delete: Admins needs to tick the profile that they want to delete, then selectDeletein the Actions (upper left of the Grid) to delete. A confirmation dialog will appear, selectOKto continue deleting.Generate: Admins need tick tick the Profile that they want to generate data, then selectGeneratein the Actions dialog (top left of Grid) toGenerate. A confirmation dialog will appear, selectOKto confirm the data re-creation. Note that Profiles can be created or overridden on previous generated profiles that depend on the admin's choice in the profile.Change Status: Admins need to tick the profile they want to change the status, then selectChange Status > Enable/Disable1in the Actions dialog (top left of the Grid) to change. A confirmation dialog will appear, selectOKto confirm the change.
In the
Actioncolumn, Admins can perform the following actions:Select > Edit: Go to theEdit Profilepage to edit the informationSelect > Download: Download the profile
In addition, Admins can Filter, Change Store View, hide/show Columns, Export Grid or edit inline.
2.2. Add New/Edit Profile Order form
To create a profile, admins need to do some following steps:
- Step 1: Enter the full information in the General section
- Step 2: Choose the template type
- Step 3: Add the condition for export profile
- Step 4: Set the mothod to send the exported file
- Step 5: Check the update history of the exported file
2.2.1. General
- From the Admin Panel, go to
Sales > Order Export > Manage Profiles - Choose
Add New Order GeneralTab
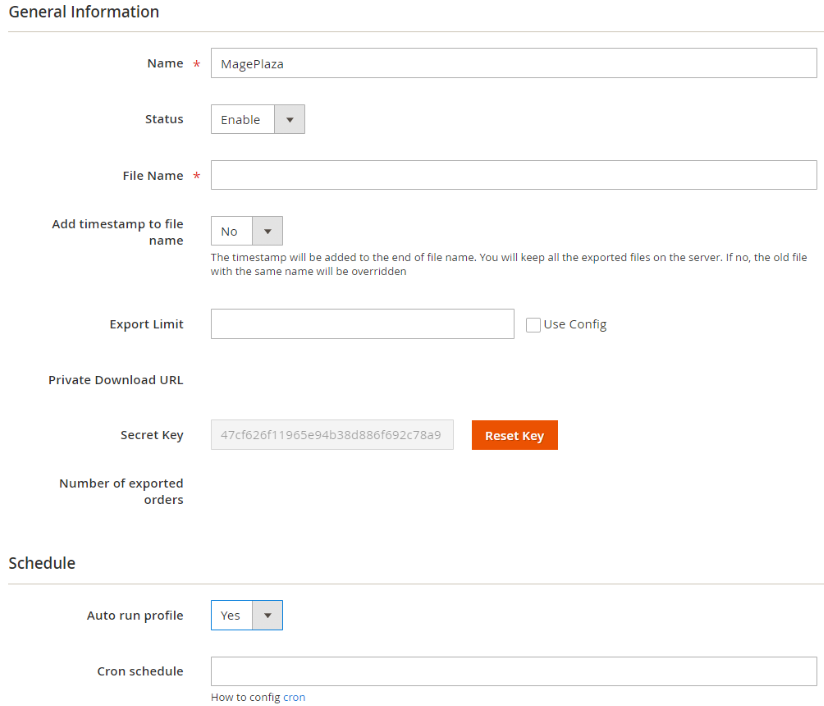
- Fill in the name displaying in the
Grid Profilefor the export type Status: Choose Enable so that Profile can auto-export based on Cron or CommandFile name: Set the file nam when it is exported. File name will be shown as soon as it is downloadedAdd timestamp to file name: Choose Yes so that when you you download, the file name will auto-add the file downloading time into the file name.
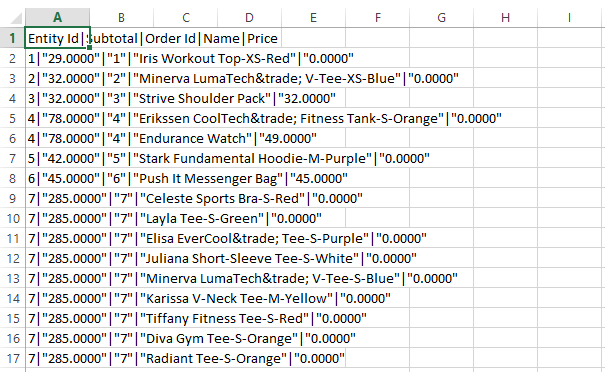
For example: File Name is OrderExport. If Add timestamp to file name = yes, when you download the file, the file name is OrderExport_20181020_132054.xml
Export Limit: Limit the number of orders that can be exported in a single iteration. If left empty or zero, each export will be 1000 orders in maximum.Private Download URL: the system will auto-create Download URL after Save. Download URL will have Secret key if possible. Anyone who has a Private Download Url can download the export file.Secret Key: Created a 32 character string when admins click on Reset Key. Secret Key will be automatically added toPrivate Download Urlafter Save.Number of order exports: After Generate, the system automatically updates the exported order number. These orders must satisfy the condition of the profile.Schedule:Auto run profile:- Select No to Generate manually (Manual): Admins need to click Generate to export file
- Select Yes to make the file automatically generate according to the cron schedule set below
Cron schedule: Set the interval between each Generate automatically
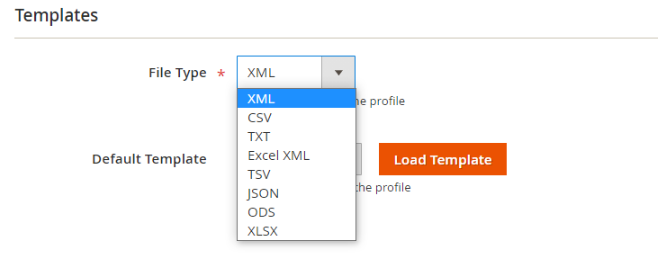
2.2.2. Template
- Choose the file format. There're 5 formats: TXT, CSV, XML, Excel XML, TSV (table-delimited)
- Click on the
Load Defaultbutton to display the template content that we have installed in theTemplatefield. Admins can configure the Template as they want with ease. - For the file format is XML, Excel XML, JSON:
Template Content: The template content is shown in this field. Admins can edit the template hereAdd values to the template by clicking on the
Insert VariablebuttonAfter adding the template content, admins can click
Download first 5 itemsto download the example about the file contentFor file format is CSV, TXT, TSV, ODS, XLSX:
Export Type:Loop order: If you choose this format, when the file is exported, it will repeat the order with each item as a line
Not loop order: If you choose this format, when the file is exported, it will not repeat the order. Each order is a line, items will be listed on that line
To add attributes, admins can click on the
Addbutton and chooseValueto add into the templateSelect the character separating the fields when exporting the file in the
Field SeparatefieldSelect the character that surrounds the fields when exporting the file in the
Field Around ByfieldTo get the header field when exporting the file, select
Yesin theInclude Field HeaderfieldClick
Previewto see an example of file content
2.2.3. Conditions
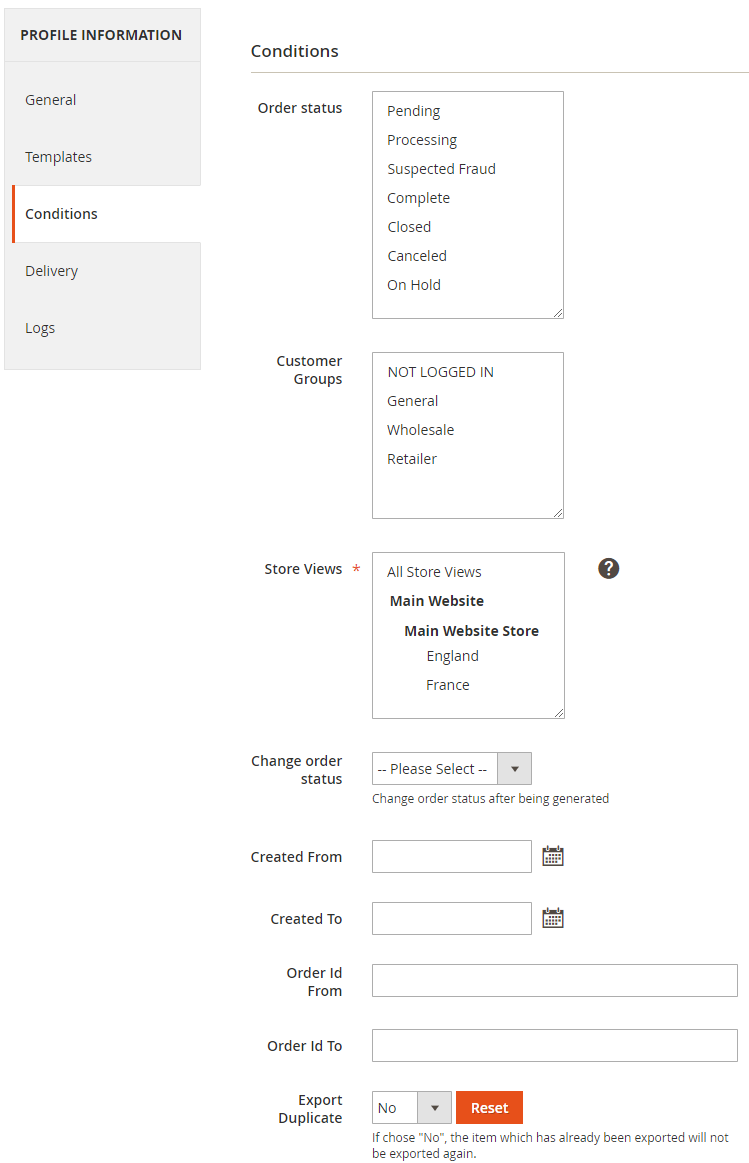
Choose the condition to export the file. Any order that meets the conditions will be exported. If all fields (except Store Views field) are empty, all orders will be exported
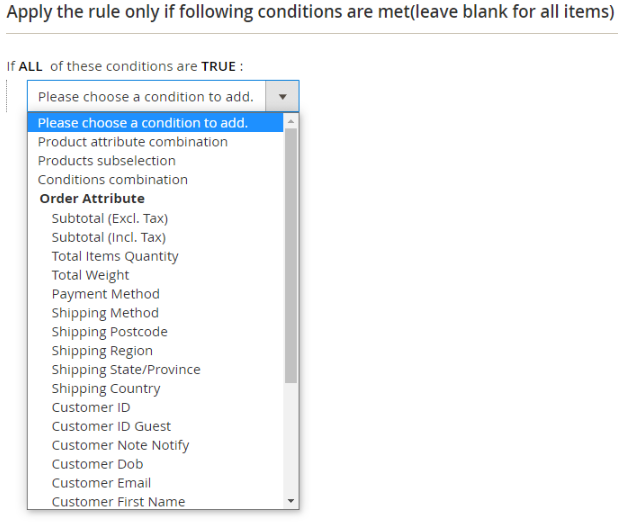
Order Status: The orders with the selected status will be exportedCustomer Groups: Orders placed by selected customers will be exportedStore Views: The orders placed on the selected Store view will be exportedChange order Status: After generating profile, the exported orders will change status to the selected item. Admins can go toSales > Operations > Orderto checkCreate From - To: The orders placed during this time will be exportedOrder ID From - To: Orders with IDs in the selected range will be exportedExport Duplicate: Select No so that the export file overwrites into the old file. However, if the file name has a timestamp add, the file is always created newly.Apply the rule only if the following conditions are met (leave blank for all products)- Set the conditions to apply the rule
2.2.4. Delivery
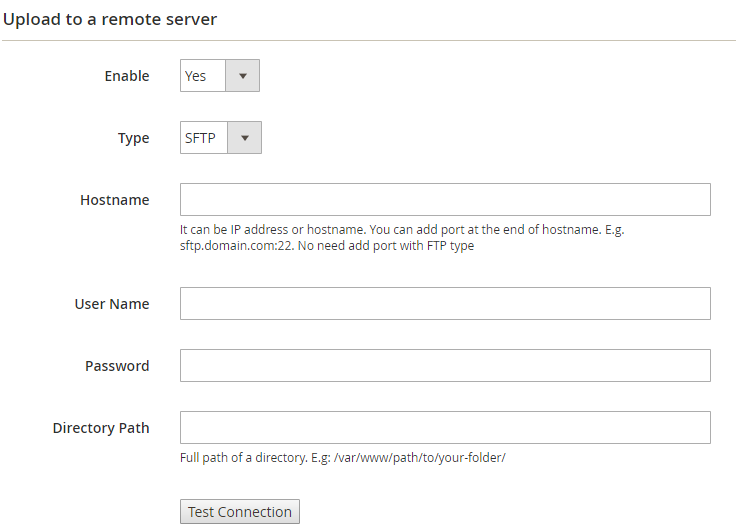
Upload to a remote server:To export the exported file to the server, select
Yesin theDeliveryfieldSelect the file sending the file in the
Protocolfield: FTP or SFTP- For FTP protocol, there is an option to use
Passive Mode. We recommend that you choose this mode to avoid being blocked by firewalls/NATs/proxies from sending files to the server.
- For FTP protocol, there is an option to use
Enter the host name in the
Host NamefieldEnter the host name in the
User NamefieldEnter the password to access the host in the
PasswordfieldIf you want to save the file where to enter the path in the
Directory Pathfield.To check whether it is connected to the host, press
Test Connection
Email:
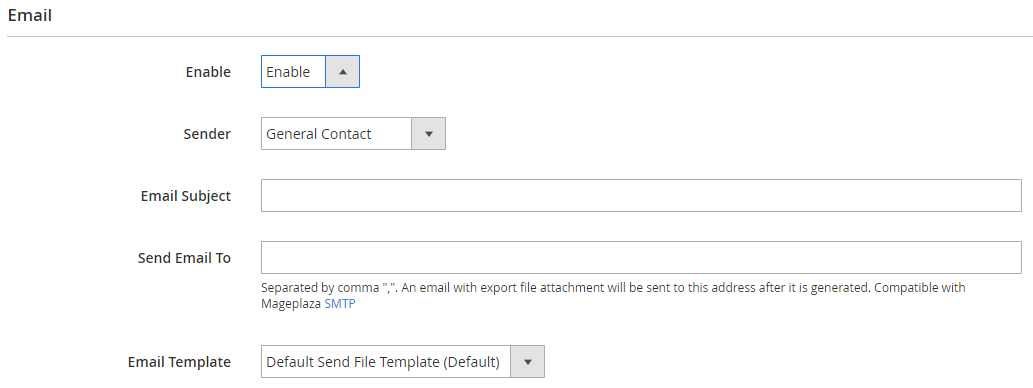
Select
Enableso that Admins can receive email with attached export file when the profile is deliveredAdmins can select one of 5 available Magento Senders to be the sender, including: General Contact, Sales Representative, Customer Support, Custom Email 1, Custom Email 2
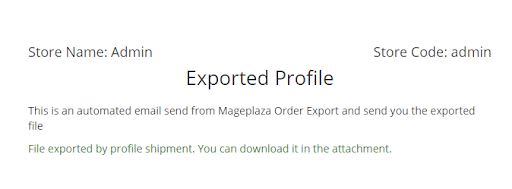
Email Subject: Fill the subject for emailSend Email To: Enter the email that admins want to receive notification when uploading file to the error remote server. You can enter multiple emails separated by commas,Email Template:- Extension is pre-installed Email notification
- To change Email Template, Admins can create another Email Template under
Marketing > Email Template. - How to create a new Email Template here
HTTP Request
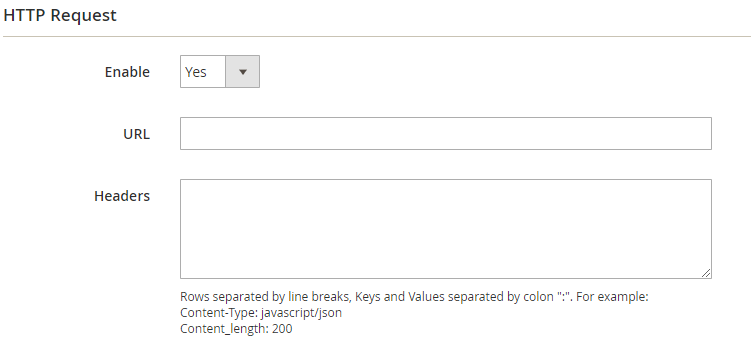
- Choose Enable = Yes to send the file by HTTP Request via URL that is filled below
- Admins can add Headers to clarify about HTTP Request
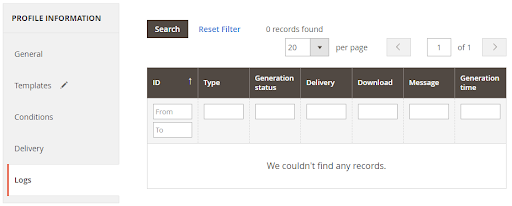
2.2.5. History
- Check the update history of exported files. Admins can check the update history of the file in Logs.
NOTE: Creating Profile of Invoice, Credit Memo, Shipment is similar to create profile of Order. However, they don't have change Order Status section.
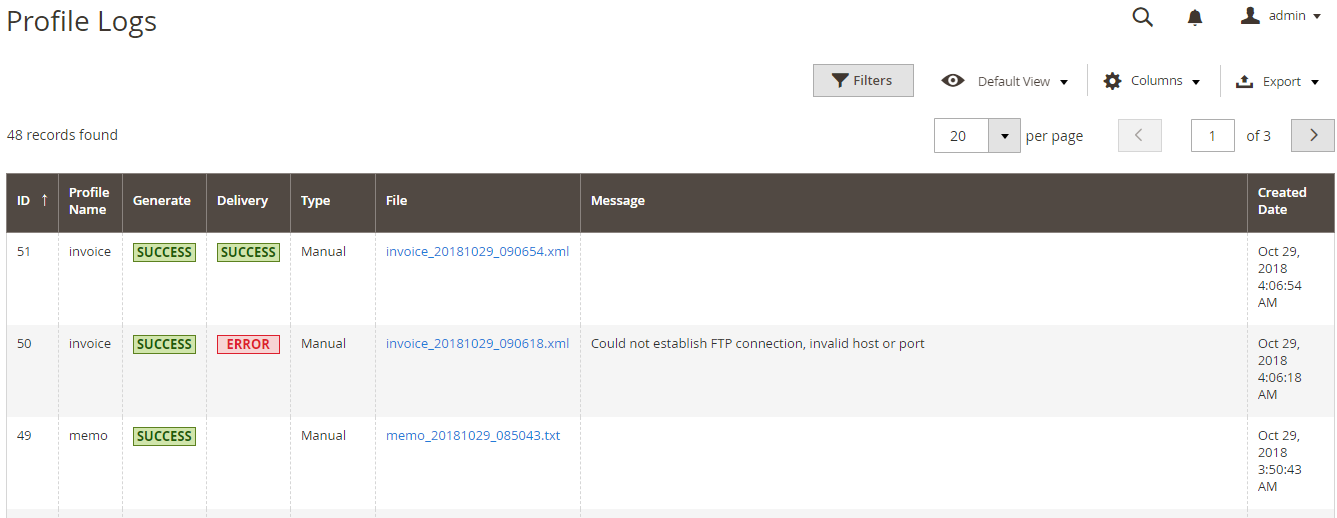
3. Manage Export Logs
This section will record all changes of profiles as status, type, notification, etc. When licking on any file, it will auto-download the file.
4. Quick Export
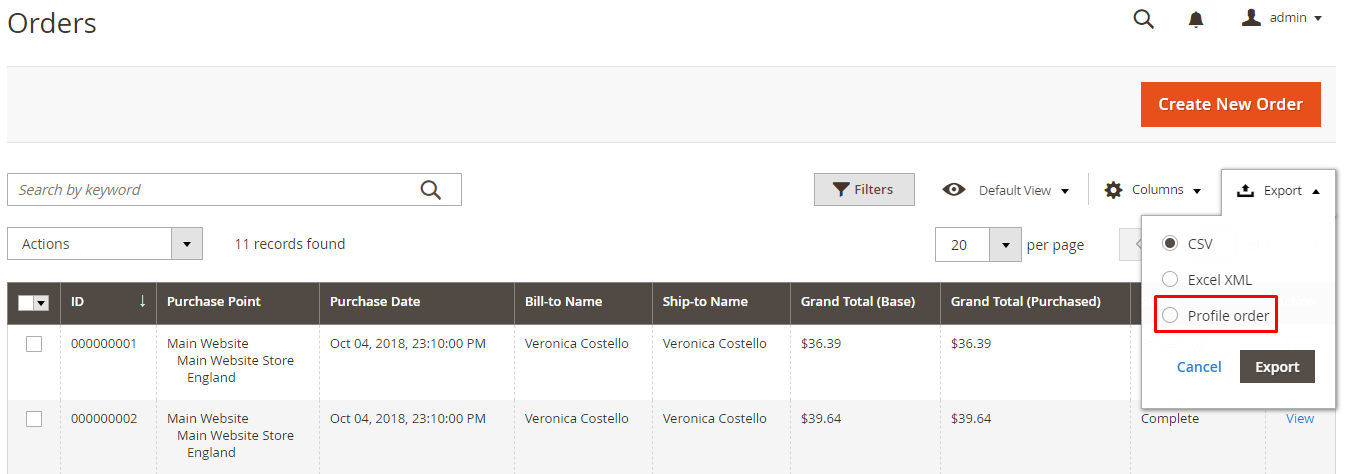
- To export quickly, admins need to create a profile for the object they want to export (Order, Invoice, Memo, Shipment)
- Admins can export any order they want without caring to the condition of the Profile
- The exported file will retrieve the type and template from the selected profile.
5. Email Notification
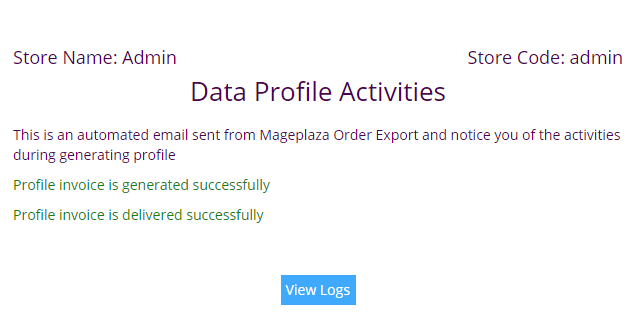
5.1. Email notification about Generate/Delivery successfully or fail
5.2. Email notification when sending the exported file uploaded successfully